
Four Mile Hiking Trail Guide
I haven’t came across a trail in Yosemite National Park that I’ve failed to be a fan of. The Four Mile trail is another one of dozens of trails in Yosemite Valley that doesn’t disappoint. The hike features Yosemite Valley’s most iconic views. Along the way hikers will be treated to stunning views of the valley floor, the entire segment of Yosemite Falls, North Dome, Cloud’s Rest, Half Dome, and the waterfalls of the mist trail at the top.
The Four Mile trail has changed a bit over the years. The history of the trail dates back to 1872 as an old toll trail to the top of the south valley. The trail led to a hotel at the base of the the trail. Originally the trail was four miles in length. Since then the trail was lengthened to 4.8 miles and deviated for safety reasons.
Unlike the trails biggest comparison, the Upper Yosemite Falls trail, this hike can be completed in more than one way. The most difficult way would be to hike up and back down, doubling the overall distance. If you can secure a one way ride or are inclined to use the bus stem, the trail can be hiked as an out and back. Hikers can choose if you’d like to do a one way hike down and be picked up in the valley or be picked up from Glacier Point.
This hike can only be done during the warmer months. The significant difference in elevation between the valley and the top allow for significant snow accumulation during the winter months. After the first major snow storms, the trail is only hikeable from the valley floor to Union Point, about two-thirds up. Due to safety reasons, during major snow storms, the entire trail can sometimes close.
On A Personal Note
Ever since I completed the trail to the top of Upper Yosemite Falls, the Four Mile trail began calling my name. This hike had equally impressive views the entire way up. I was fortunate enough to have my loving wife pick me up at the top of Glacier Point and completed this hike as an out and back. Take the time to enjoy the views. The higher the elevation, the more impressive the sights get.
To compare the Four Mile trail to the Yosemite Falls trail would be like comparing apples to oranges. Both hikes are great in their own ways. If you have done one trail, I’d highly suggest doing the other one to take in some impressive views on both sides of the valley. If I had to pick, I’d say that the Upper Yosemite Falls trail switchbacks are more difficult. Given that the Four Mile trail can be done as an out and back this trail wins the easier factor.
I planned this trail perfectly to start this hike in the mid-afternoon hours. My wife had arranged to pick me up at Glacier Point. From there we enjoyed one of our favorite beers and watched the sunset over Half Dome.
Sources:
1. N.a. “Four Mile Trail.” Yosemite National Park. National Park Service. https://www.nps.gov/yose/planyourvisit/fourmiletrail.htm. October 2020. Accessed 11 November 2020.
Do you have any updates to the hiking trail or want to share your hike/pictures? Please leave a comment below.
- Overall Views: 100%
- Overall Difficulty: 95%
Four Mile Trail Quick Facts:
- Elevation: 6,784 feet.
- Elevation Gain: 3,497 feet.
- Max Elevation: 7,211 feet.
- Estimated Distance: 4.8 miles one way; 9.6 miles round trip.
- My Actual Distance: 5.4 miles.
- Estimated Time: 3-5 hours one way; 5-8 hours round trip.
- My Time: 2 hours 41 minutes moving; 3 hours 47 minutes total.
Four Mile Trail Directions:
Open in maps. The easiest way to describe this location is that it’s on the south side of the valley wall across the street from the Sentinel Beach picnic area and near the Swinging Bridge. If you’ve passed the Yosemite Valley Chapel, you’ve gone too far. There is parking along the street but it does fill up very quickly. The trialhead is marked and easily visible from the road.
Other options of accessing the trailhead are taking the park’s shuttle system if it’s up and running. You could also opt to park across the Merced River on the north side of the valley at the Yosemite Valley Lodge. Hiking across the valley will obviously add to distance and time, however.
Glacier Point Directions
Open in maps. Access to the trailhead is very easy at the end of Glacier Point Road. At the Glacier Point viewing area there is a paved ramp that leads down to the parking lot. At in the parking lot will be a trail marker pointing in the direction of the Four Mile Trail. The best option for reaching this vehicle will be getting dropped off by someone. If the park’s shuttle system is running, you can catch a ride here then hike down.
During the winters this road is closed due to heavy snowfall. Glacier Point Road does tend to open up earlier in the year than Tioga Pass. Please check with the park on the current road conditions if you plan on traveling when there may be snowfall. There is limited cell phone service in this area so know where you’re headed before you head deeper into the park.
For both trailheads, cost is admission to Yosemite National Park. An America The Beautiful pass will also work.
Four Mile Trail Pictures:
-
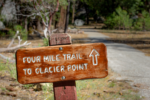
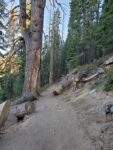
- The start of the Four Mile Trail – easily marked.
-
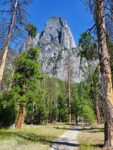
- A look up 3,000+feet towards the final destination.
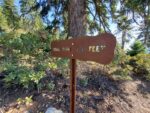
-

- Some distance information.
-

- The trail begins in a fair amount of shade as near the valley floor.
-
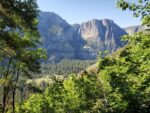
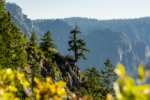
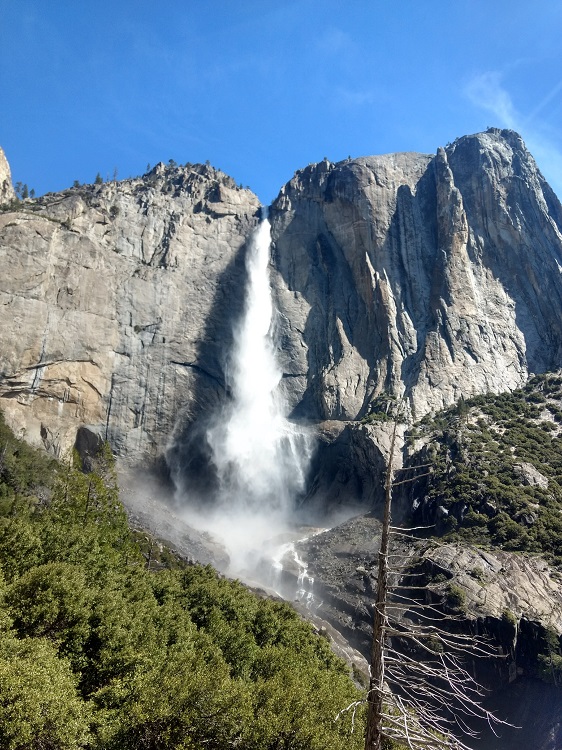
- As the elevation climbs, the forest canopy thins out. One of the first views of Yosemite Falls – the views get better on the way up.
-
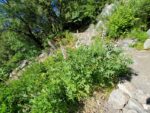
- Despite being up against the valley walls, there are a fair amount of wildflowers on the way up.
-
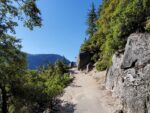
- Most of the trail on the way up is exposed to the sun.
-
- The Marker for Union Point.
-
- Union Point is a great place to take a breather on the way up.
-
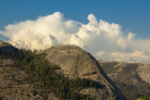
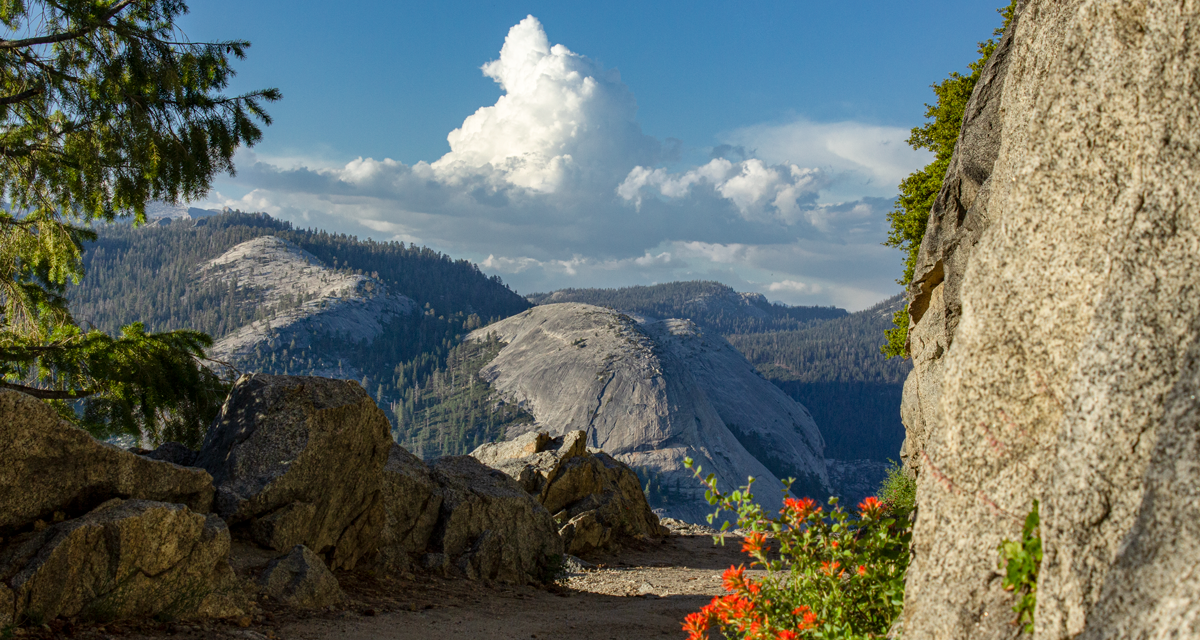
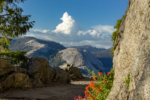
- A closer view of North Dome and a developing thunderstorm.
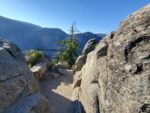
-
- The trail evens out close to Glacier Point and winds through a conifer voices.
-
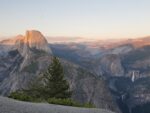
- Take some time to enjoy the view and the waterfalls of the Mist Trail down below.
Who The Four Mile Trail Is For:
Advanced Hikers: This trail is a bucket list kind of hike for advanced hikers. It makes an excellent completion to go along with completing the Upper Yosemite Falls Trail. The views are just so surreal. It’s a worthy challenge but not hard enough. If you’re looking to really push
Expert Hikers: For even those long distance hikers, this trail is a worthy of a challenge. Of course, if you’re really wanting to push yourself you’ll complete the trail both ways. Don’t sell yourself short if you only want to do the hike one way though. For those expert hikers looking for a more difficult challenge, consider the Panoramic Trail. That hike is a sixteen plus mile trek that connects the Mist Trail to the Four Mile Trail.
It’s always a good idea to be aware of what type of hiking level you’re at.
Best Time Of Year To Hike The Four Mile Trail:
The best time of year to hike this trail to view the waterfalls will be from April to around July. Depending on the snow pack for the year, Yosemite Falls can start tapering off by July and dry up by the end of the summer. The likelihood for ice along the trail decreases as spring progresses.
Summers can be quite hot especially against the granite walls of Yosemite Valley. The morning hours will be the friendliest in terms of shade provided by the tall valley walls. Once the afternoon comes the trail will be in a significant amount of sunlight and heat once you leave the valley floor.
Sun position will also affect the views. The morning sunlight will make the north valley walls and Yosemite Falls more visible. The afternoon lighting will highlight Half Dome and the park’s High Sierra. Thunderstorms are common any time of the year but especially during late spring and during the summer.
Always be prepared by checking the weather conditions before a hike.
Four Mile Trail Conditions:
The trail immediately heads away from the road and crosses the Yosemite Loop Trail and begins heading up the canyon walls. Once heading up the canyon walls, there is a brief period of time to enjoy in the shade before breaking out above the forest canopy. The hike is mostly on carved out granite and old road from the original trail. The elevation gain begins almost immediately with the majority of the switchbacks coming through the middle portion of the hike.
Union Point
At about the three mile mark there will be a fork in the trail that leads to an overlook along the trail. This viewing area is known as Union Point. It will probably be one of the more crowded areas along the trail as many people hike down from Glacier Point and use this area as a turnaround point. Union Point is known for its views overlooking Yosemite Valley to Yosemite Falls.
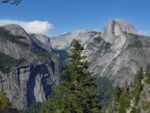
Once past Union Point there’s just one last dozen or so switchbacks to get through. From there the trail straightens out and is a gentle incline to the foresty top of Glacier Point. The views of Yosemite Falls will fade past Union Point and the trail’s primary focus will become Half Dome, the Merced River gorge, and Yosemite’s high country.
If you’ve never been to Glacier Point before, spend some time to take in the views from there. Yosemite’s backcountry and Vernal and Nevada falls are a more than welcome sight to greet you at the top. The odds of seeing a rattlesnakes along this trail are pretty small given the high altitude and short growing season. However, always keep your eyes open and be alert. There is no poison oakalong the trail.